Hey guys, I’m back with a new article, continuing on the same topic as my last article. Today we’re going to talk about creating the perfect virtual environment for malware analysis.
I think it’s important to note that this article is based on my personal experience and might not be the best way to set up a malware analysis environment, but it’s a good starting point (at least for me).
For this task, we’re going to use mitmproxy in combination with WireGuard to create a transparent proxy that can be used to analyze traffic between the analyst’s virtual machine and the malware.
As you might know, VMware recently released a new version that allows us to use the Pro version free for personal use. You can read more on the VMware blogpost.
Requirements :
Once you have all the ISOs downloaded, we can start by creating the VMs.
Article based on the excellent work of Eric Parker
Setup the Kali Linux VM
As usual, you can create a new VM by clicking on the “New” button on the top right of the VMware Workstation window.
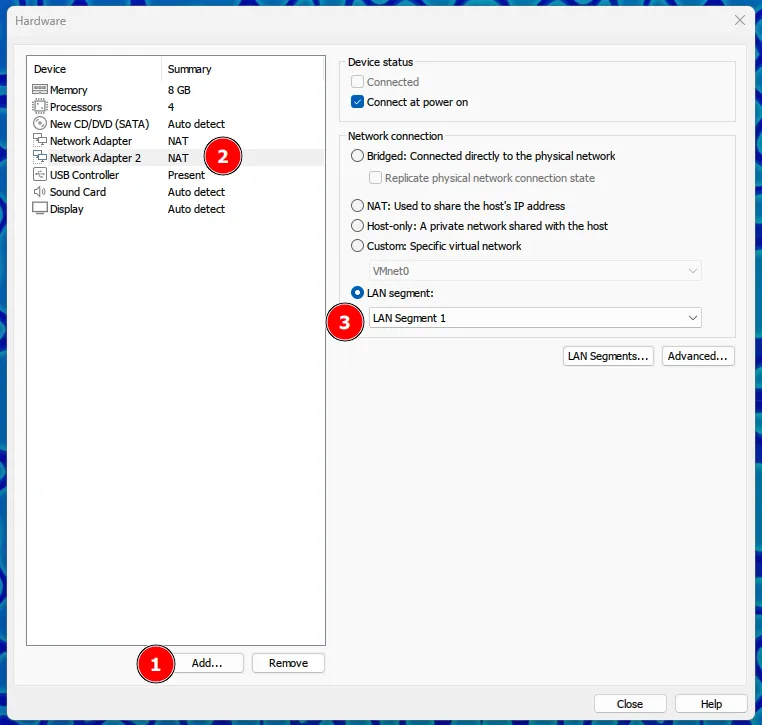
However, there’s a catch: you need to add a new Network Adapter to the VM at the end.
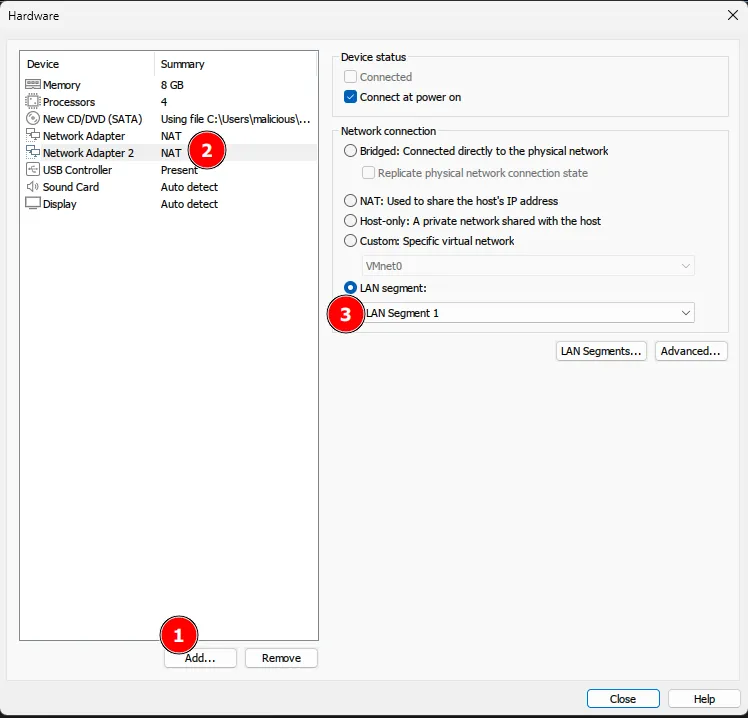
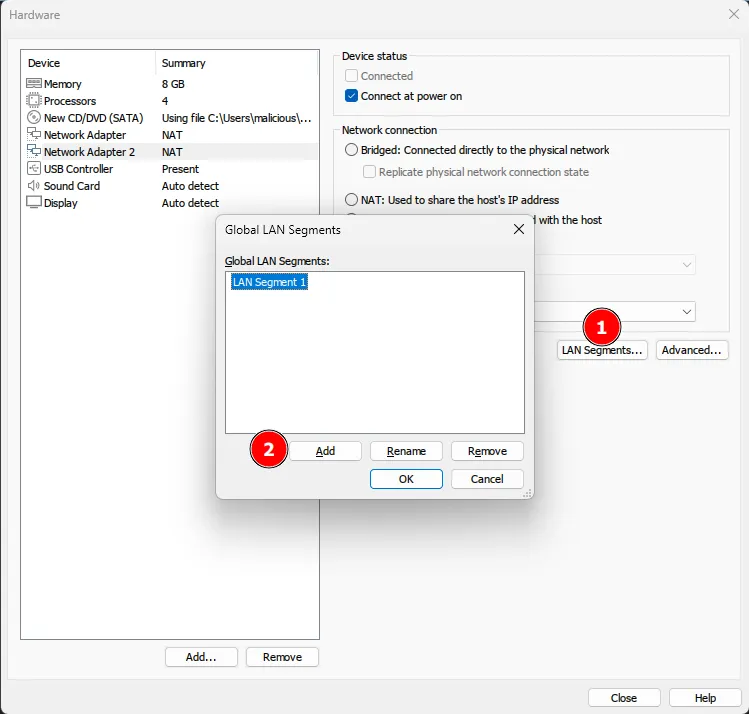
If you don’t have a LAN Adapter, you can add a new one by clicking on the “Add” button on the top right of the VMware Workstation window.
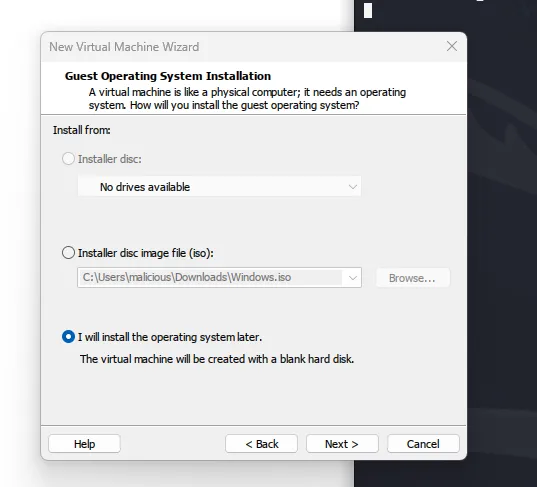
Once you have the VM created, you can start by installing the OS. You may encounter this message during the installation process.
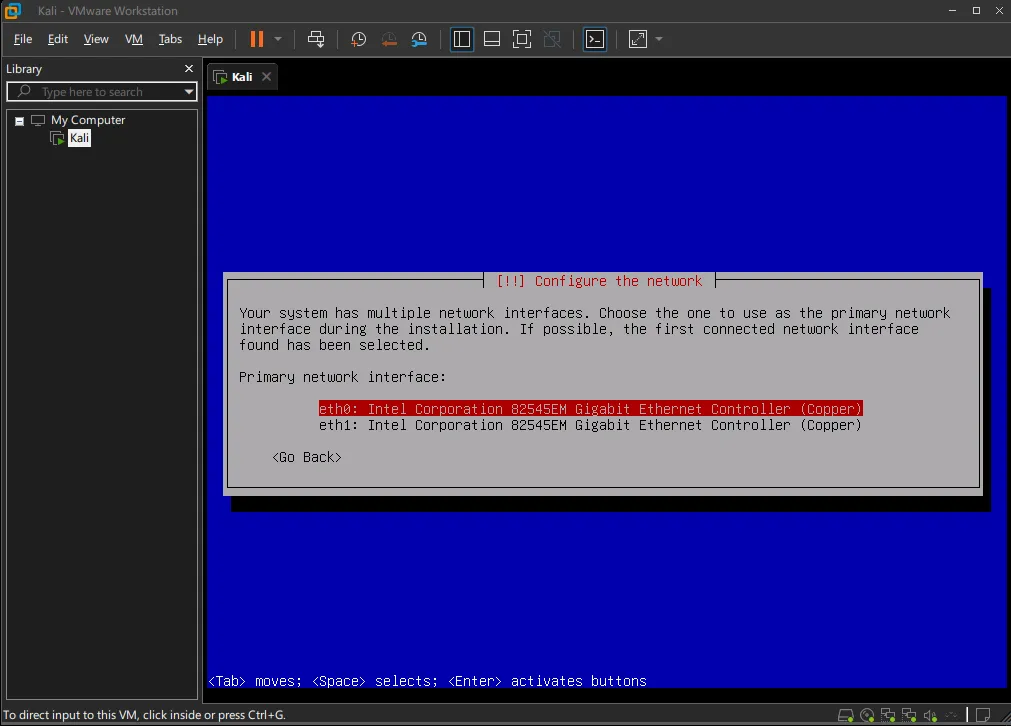
Select your NAT (eth0 for my case) interface and proceed with a normal installation.
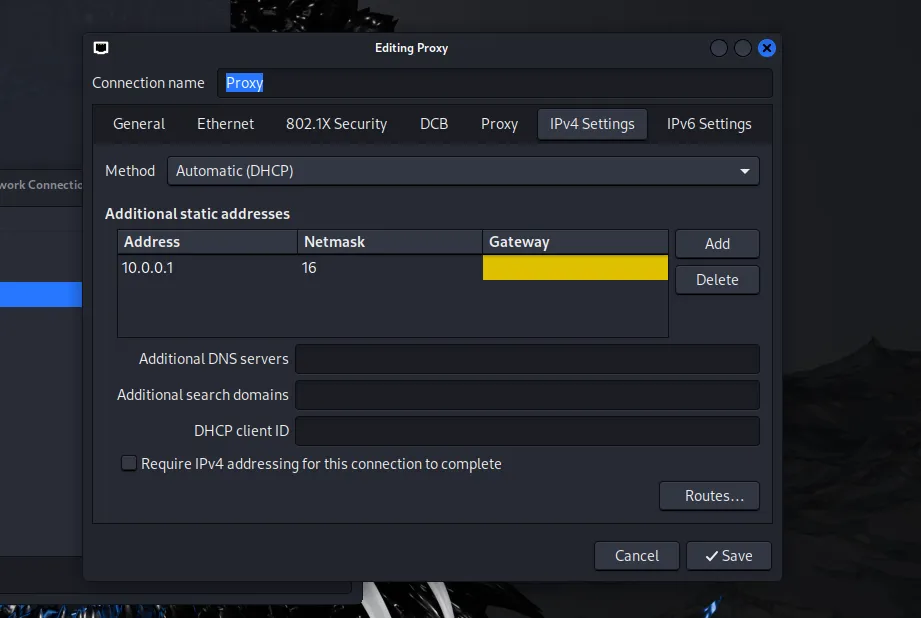
Once the installation is done, we need to configure the proxy interface on the Kali Linux VM.
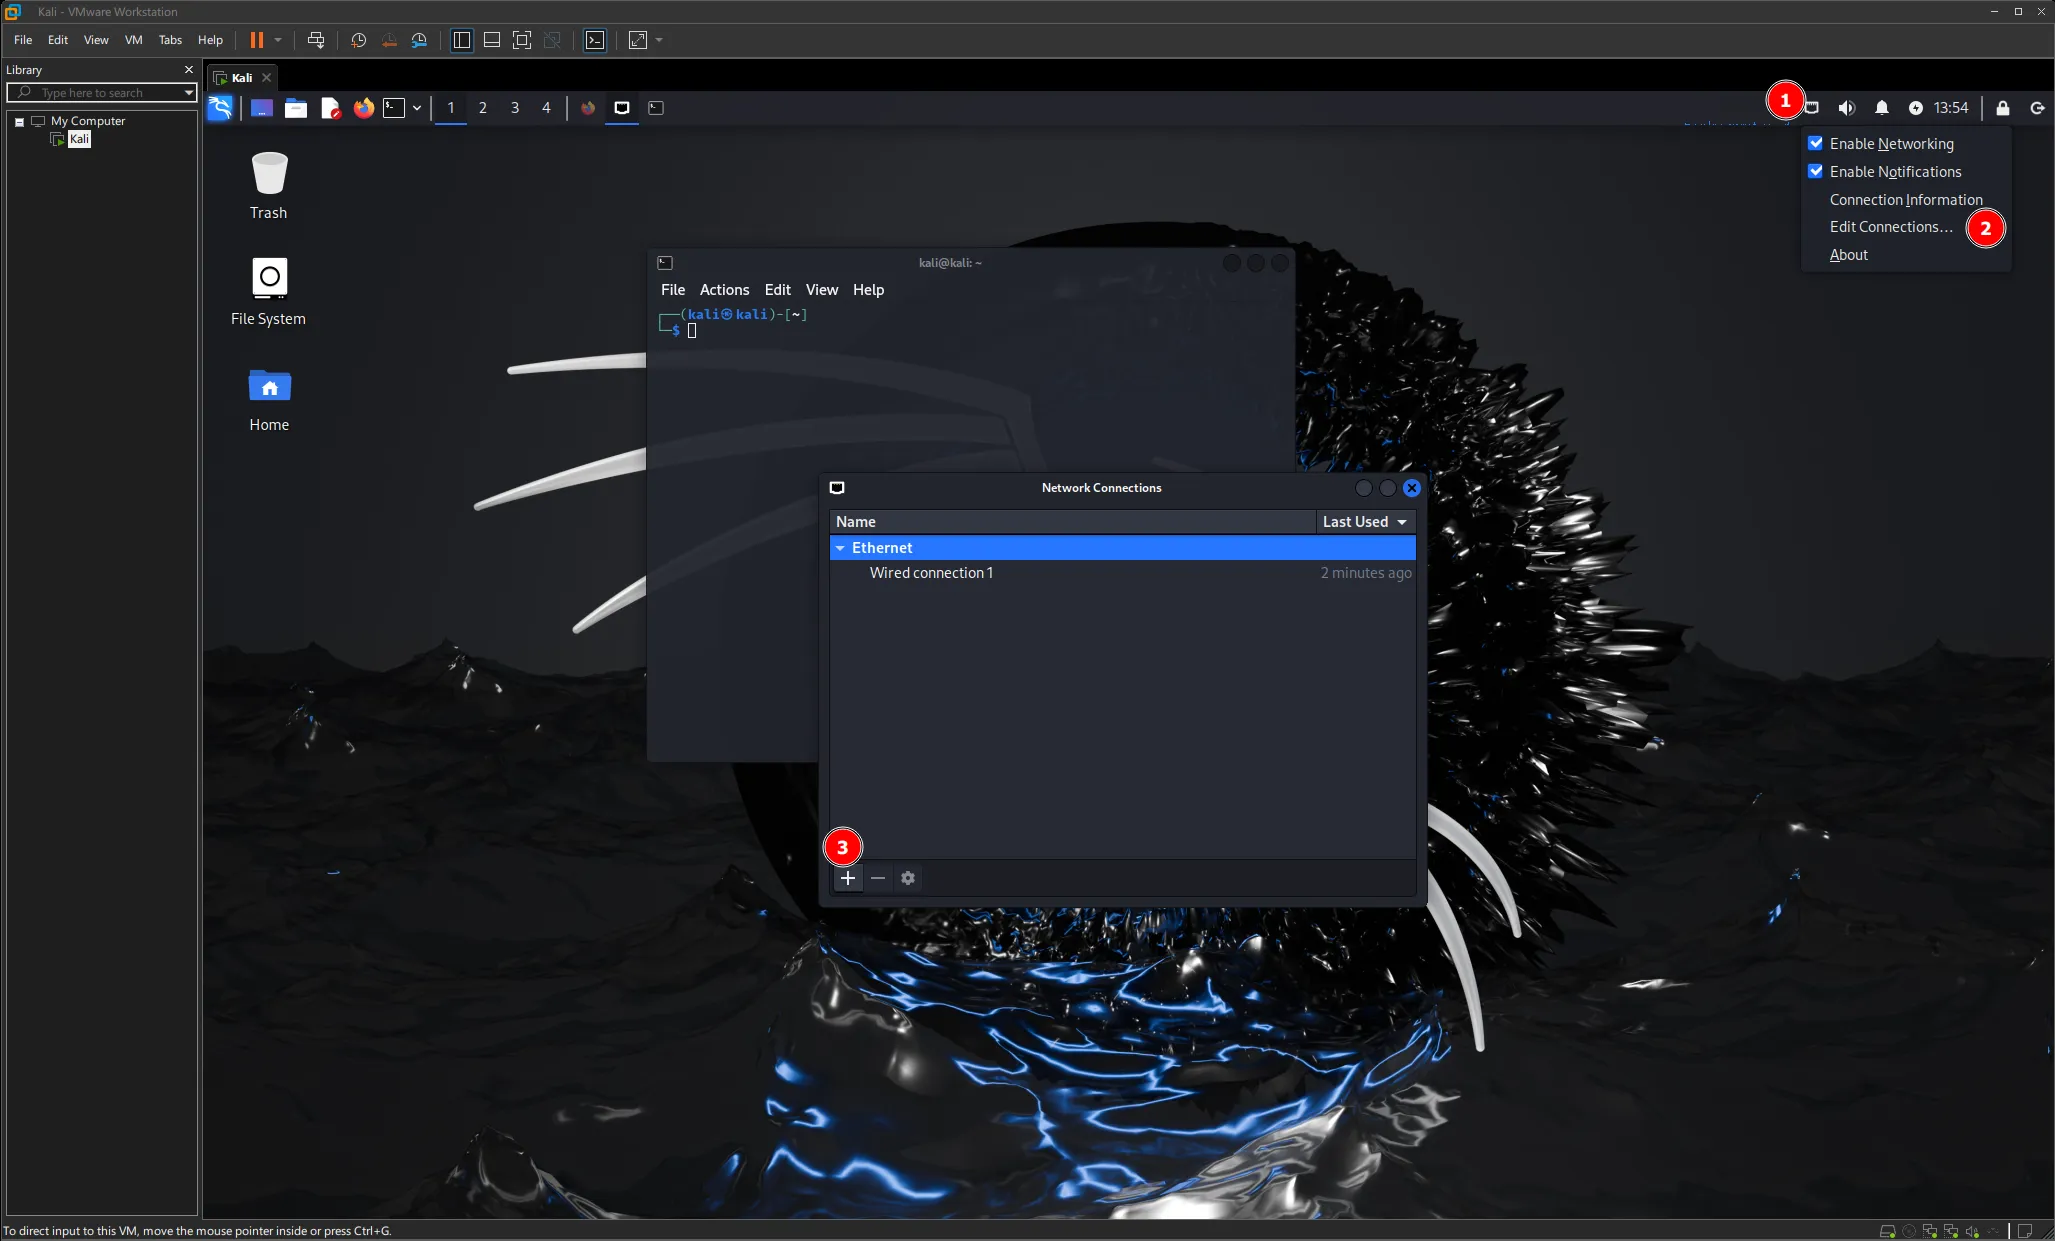
Then click create, and configure the IPv4 address to something like 10.0.0.1/16
Setup mitmproxy
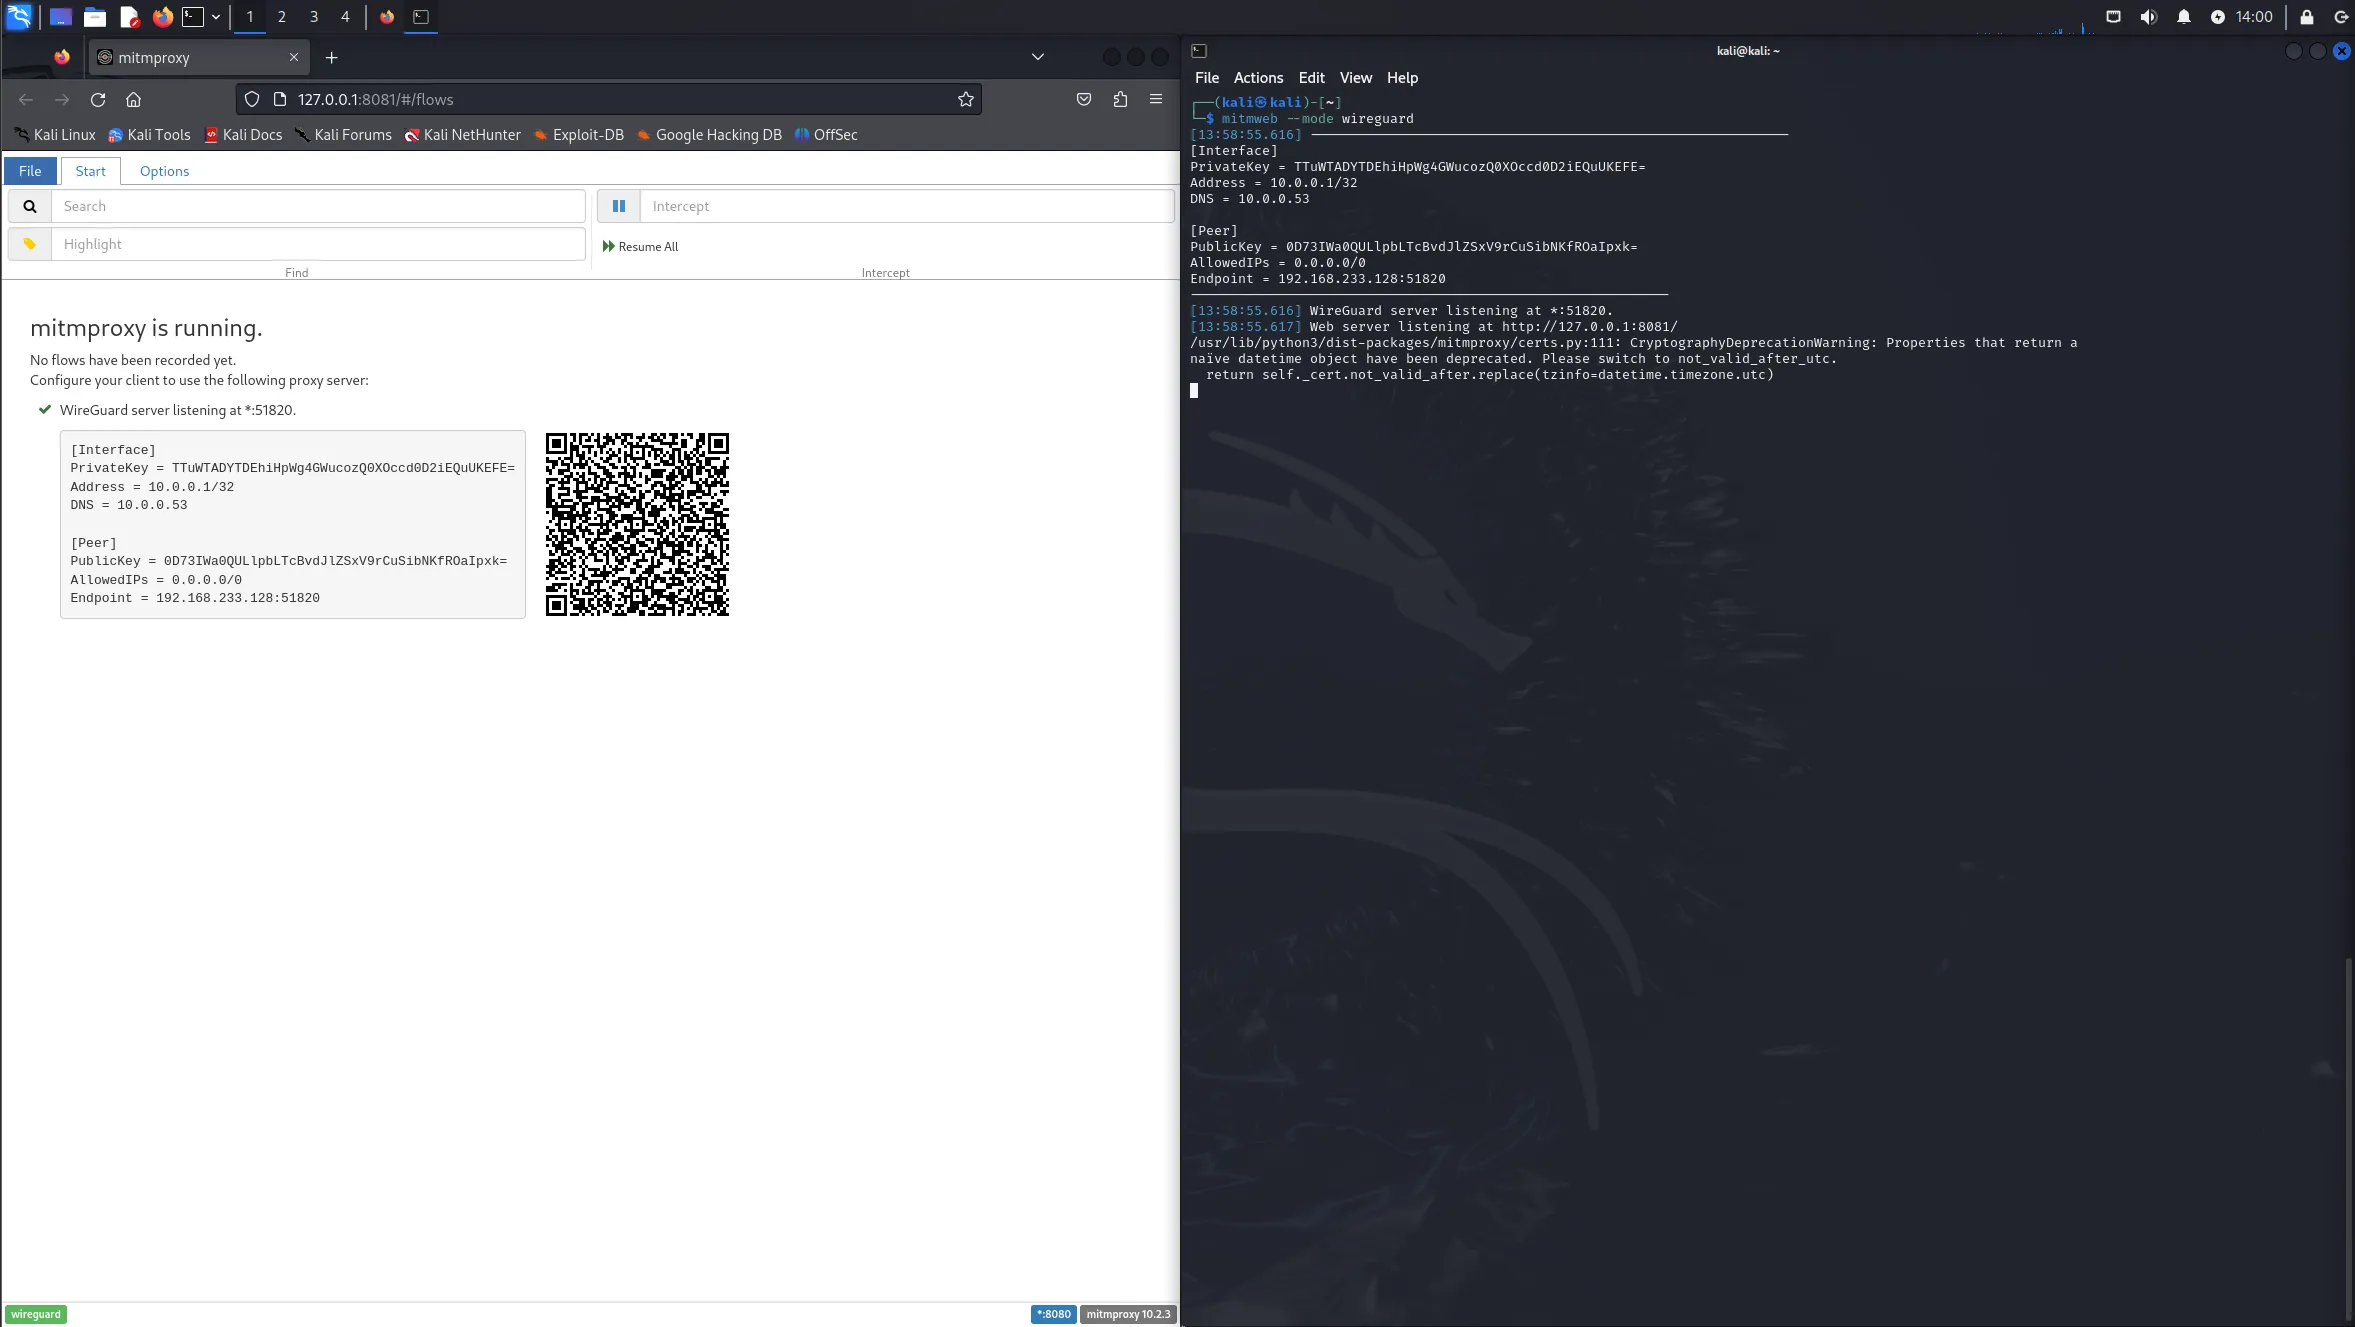
To start the proxy, we can use the web interface of mitmproxy with the following command :
mitmweb --mode wireguardYou can then access the proxy interface by going to http://127.0.0.1:8081/#/flows
We have finished the setup of the Kali Linux VM. Now we can move on to the next step. Pay attention to the Windows VM, as multiple steps are necessary to create “undetectable” virtual machines.
Setup the Windows 10 VM
To create an “undetectable” virtual machine, we don’t need to use the VMware Tools some malware can use to detect the virtual machine. To bypass the automatic VMware Tools installation, we need to select the option “I will install the VMware Tools myself” during the OS installation.
Proceed with the installation, and configure the virtual machine with at least 250GB of storage and 8GB of RAM.
You also need to add a new Network Adapter to the VM and configure it to the same LAN segment as the Kali Linux VM.
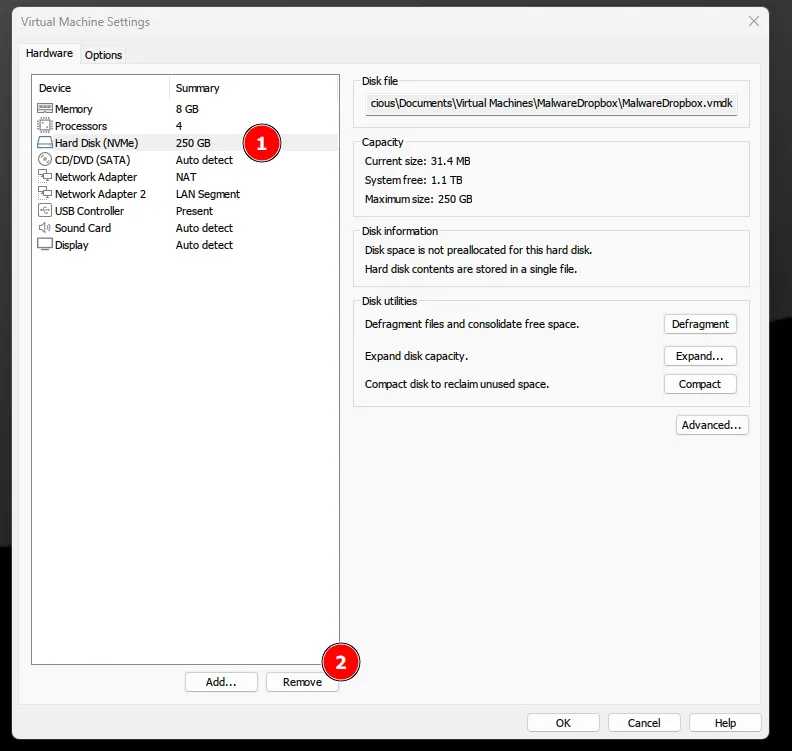
Click finish and do not start the VM yet. We need to change the disk type to SCSI to be able to change the disk manufacturer later (replacing it with the default VMware one).
To remove the default, click on the VM name on the left, select the hard drive, and click on the ”-” button.
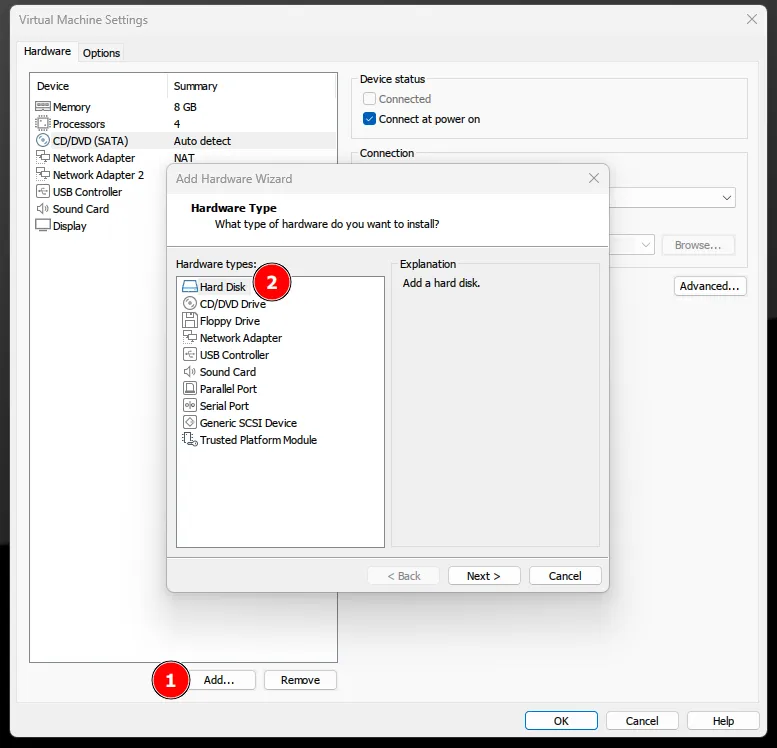
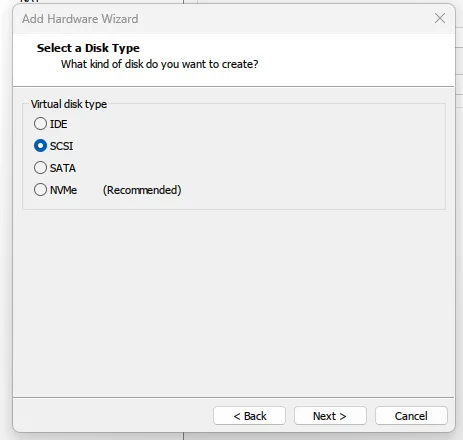
Add a new hard drive, select SCSI, and click on the ”+” button (don’t forget to set the size to at least 250GB).
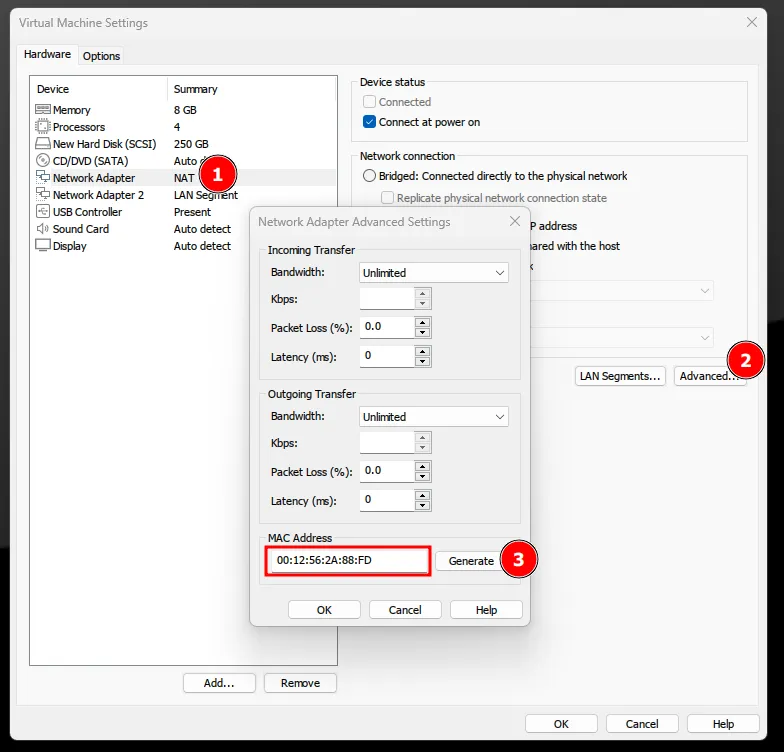
Now that we have changed the disk type, we need to change the default MAC address to a random one to bypass the default address provided by VMware.
For reference, here are the default MAC addresses VMware uses:
00:05:69:xx:xx:xx // VMware, Inc.
00:0c:29:xx:xx:xx // VMware, Inc.
00:1C:14:xx:xx:xx // VMware, Inc.
00:50:56:xx:xx:xx // VMware, Inc.
To change the MAC address, select the two Network Adapters and click “Advanced” on the bottom right of the window.
Don’t forget to the same on the other Network Adapter.
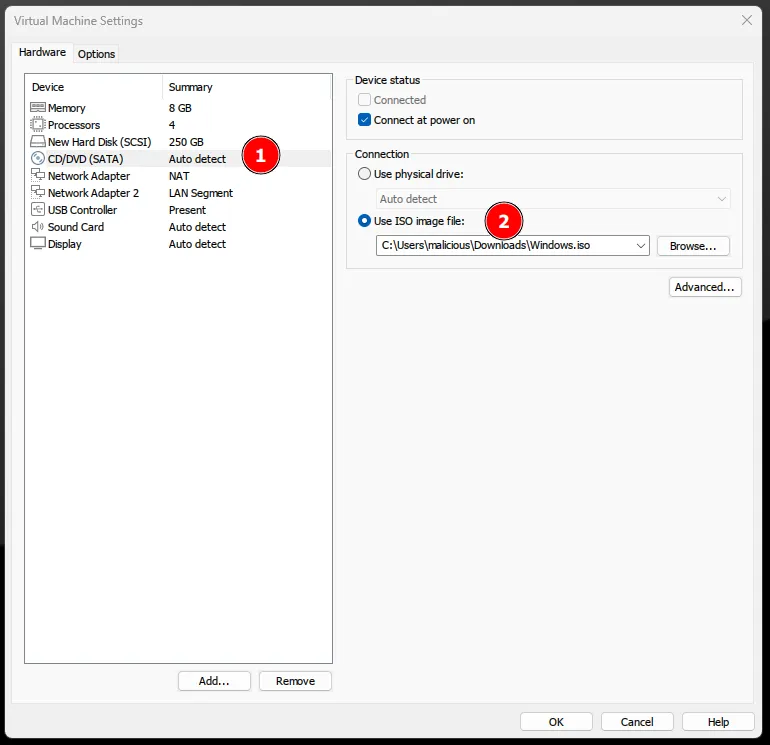
Once that’s done, load the ISO and proceed with a normal windows installation :
- Windows 10 Pro
- Local Account
- Remove all the telemetry
Configure the Windows 10 VM
When the installation is complete, we can start by dowloading the ShutUp10 and VmwareHardenedLoader tools.
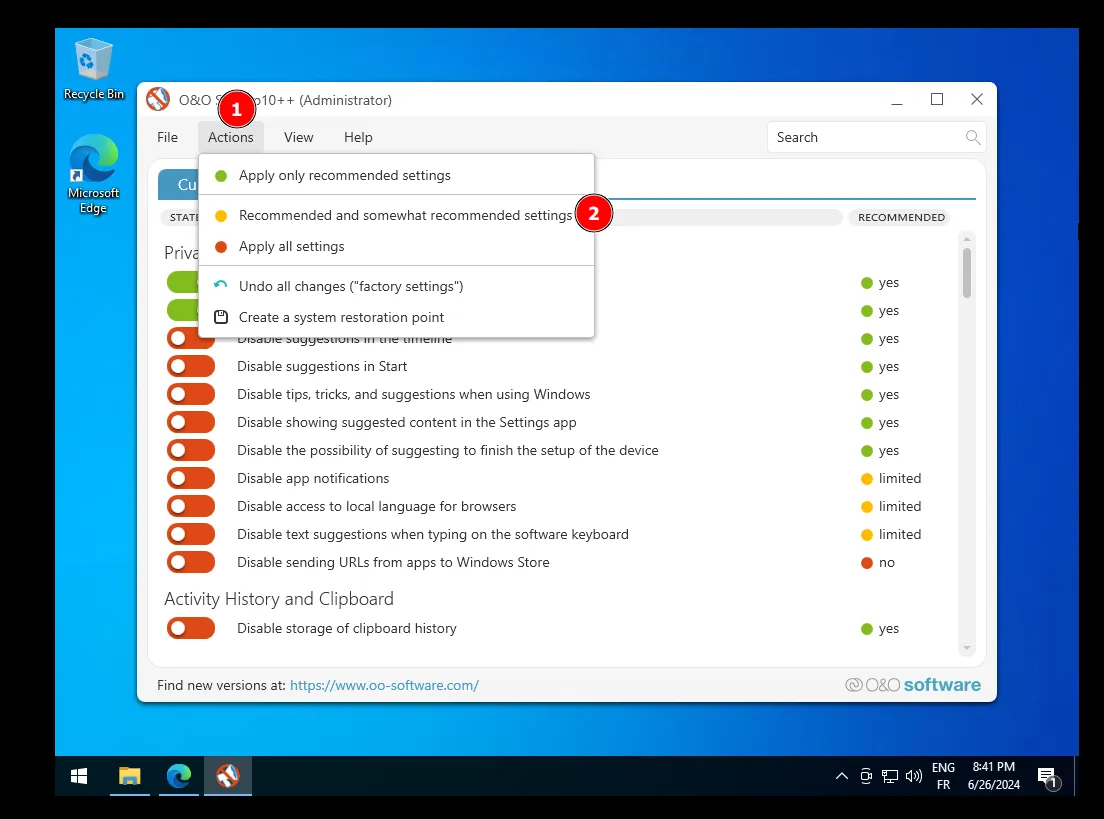
Select the recommended settings. Once you click on the button, you can quit the application and do not restart the machine yet; we need to install VMwareHardenedLoader first.
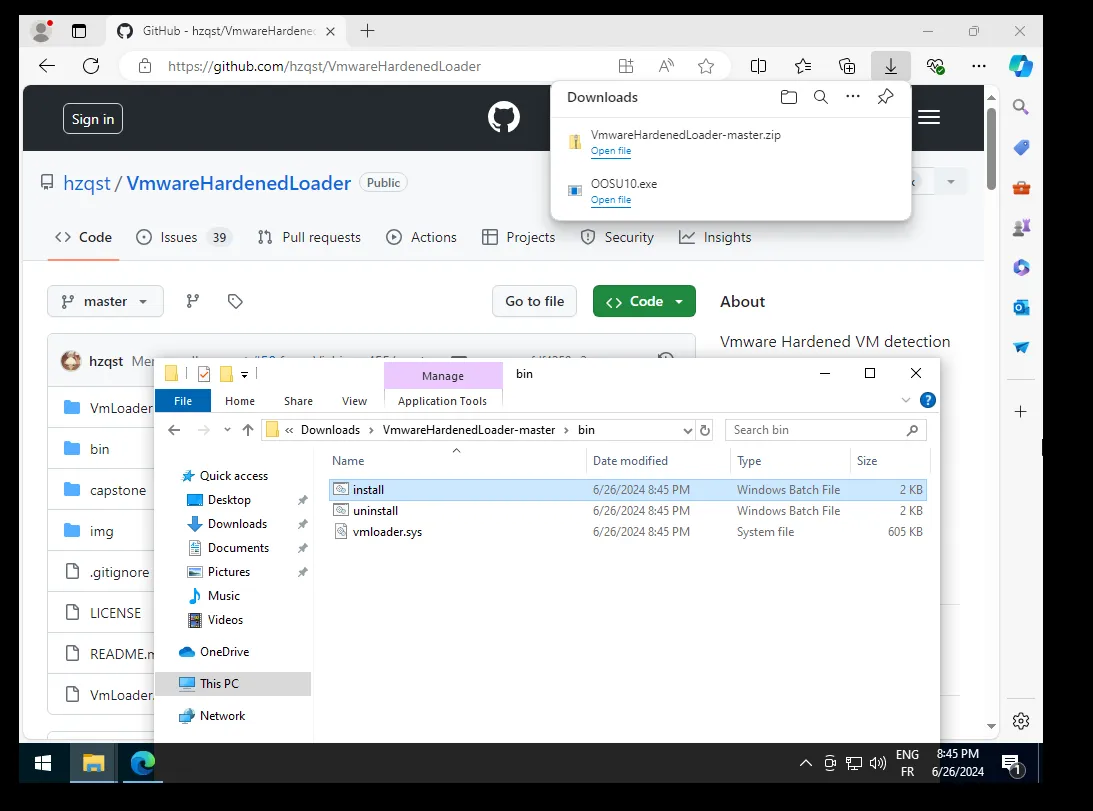
Download the project’s files and go to the “bin” folder, then click on the bat file “install.bat” to start the installation.
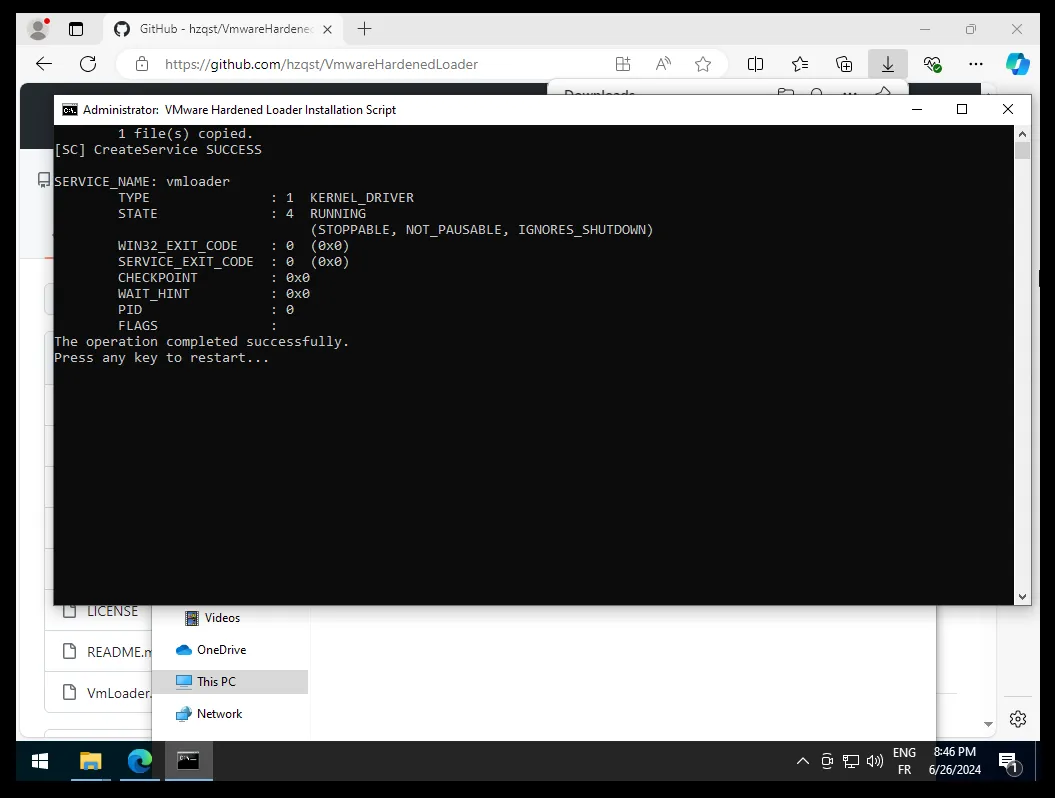
Proceed with the installation, and restart the machine.
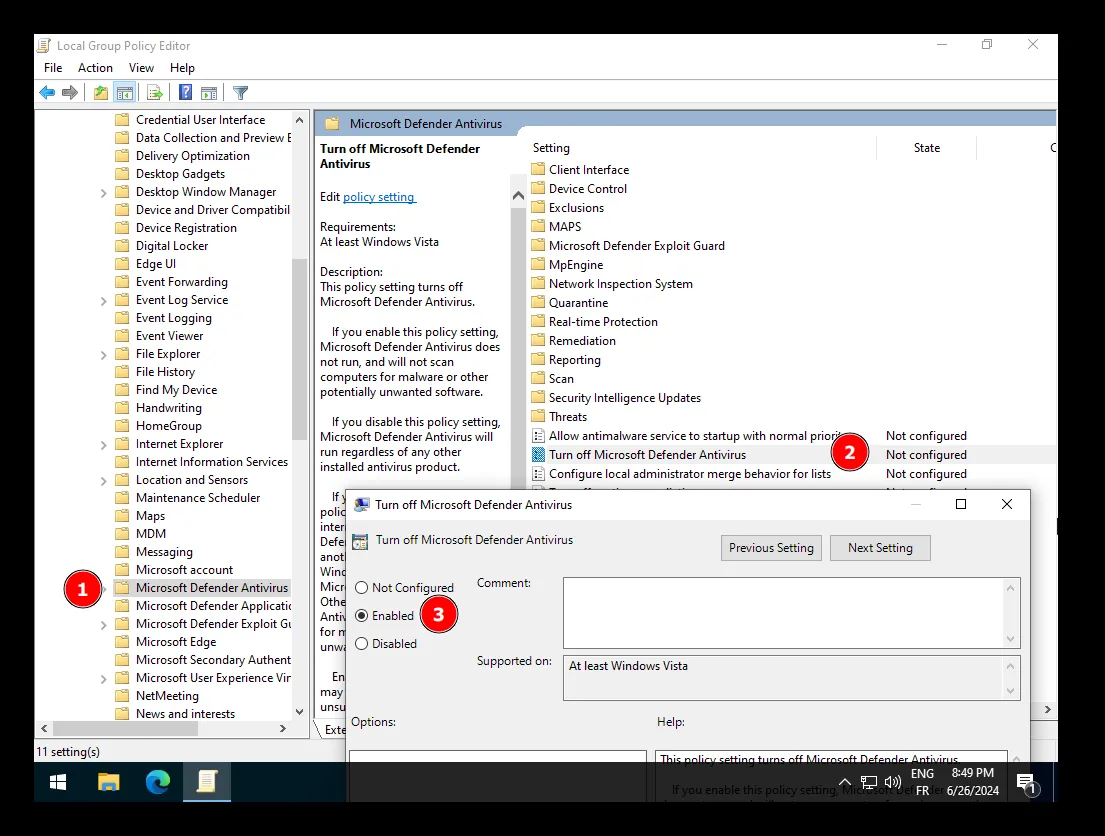
Next, we need to disable Windows Defender using Group Policy and install WireGuard.
Open the Local Group Policy Editor “gpedit.msc” and navigate to “Computer Configuration” > “Administrative Templates” > “Windows Components” > “Microsoft Defender Antivirus” > “Disable Windows Defender”.
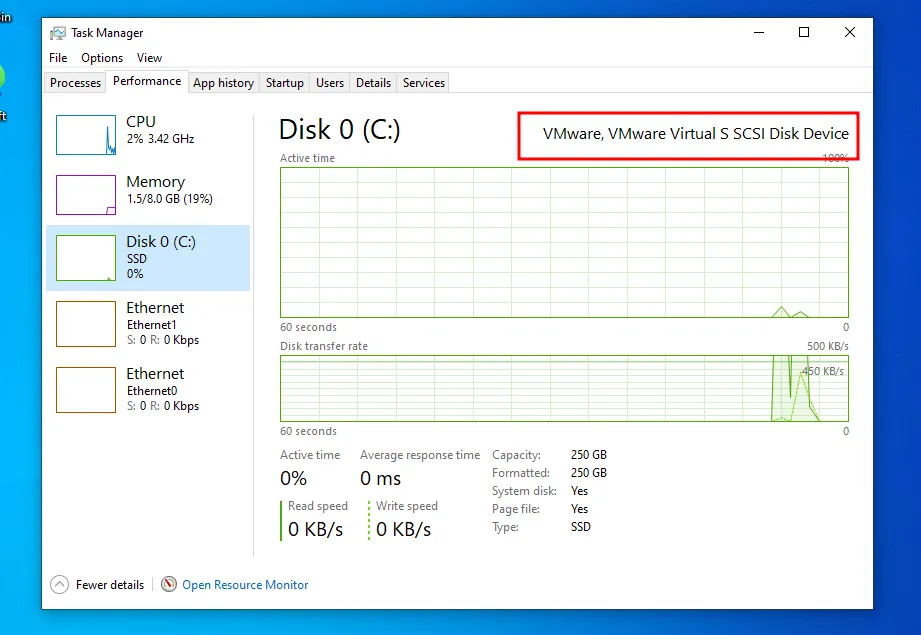
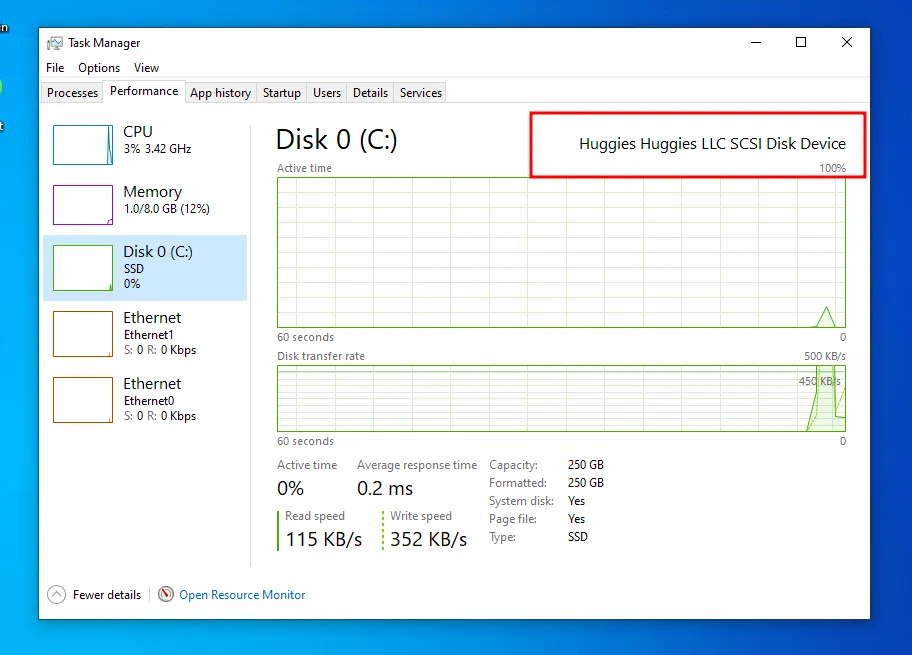
You can now shutdown the machine. We are going to spoof the hard drive manufacturer to bypass some detection mechanisms.
By default the hard drive manufacturer is set to “VMware”.
To change the hard drive manufacturer, we need to update the file yourmachinename.vmx. By default, on Windows machines, it’s located in the C:\Program Files\VMware\VMware Virtual Machines\ folder.
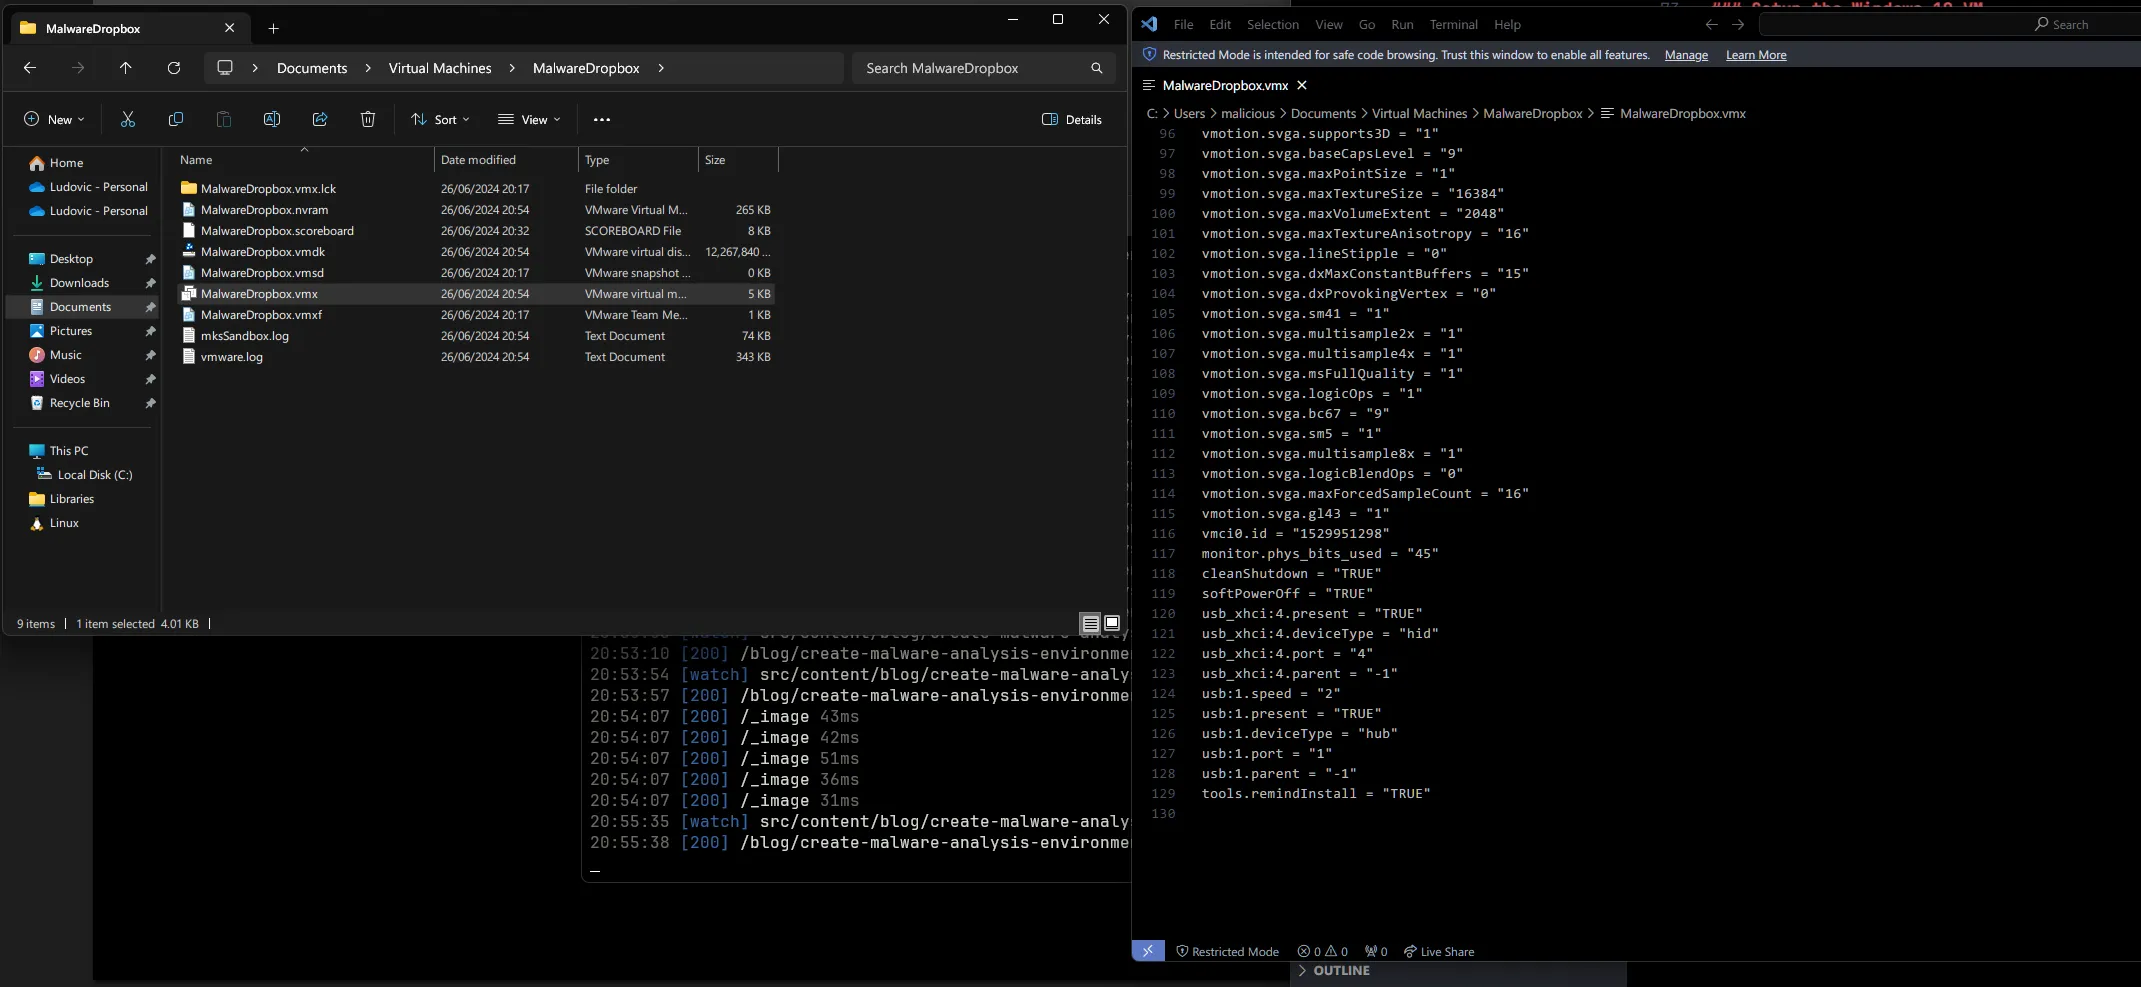
Append the following lines to the config file :
hypervisor.cpuid.v0 = "FALSE"
board-id.reflectHost = "TRUE"
hw.model.reflectHost = "TRUE"
serialNumber.reflectHost = "TRUE"
smbios.reflectHost = "TRUE"
SMBIOS.noOEMStrings = "TRUE"
isolation.tools.getPtrLocation.disable = "TRUE"
isolation.tools.setPtrLocation.disable = "TRUE"
isolation.tools.setVersion.disable = "TRUE"
isolation.tools.getVersion.disable = "TRUE"
monitor_control.disable_directexec = "TRUE"
monitor_control.disable_chksimd = "TRUE"
monitor_control.disable_ntreloc = "TRUE"
monitor_control.disable_selfmod = "TRUE"
monitor_control.disable_reloc = "TRUE"
monitor_control.disable_btinout = "TRUE"
monitor_control.disable_btmemspace = "TRUE"
monitor_control.disable_btpriv = "TRUE"
monitor_control.disable_btseg = "TRUE"
monitor_control.restrict_backdoor = "TRUE"
And add the following two lines to change the name for the manufacturer and the model.
scsi0:0.productID = "Whatever you want"
scsi0:0.vendorID = "Whatever you want"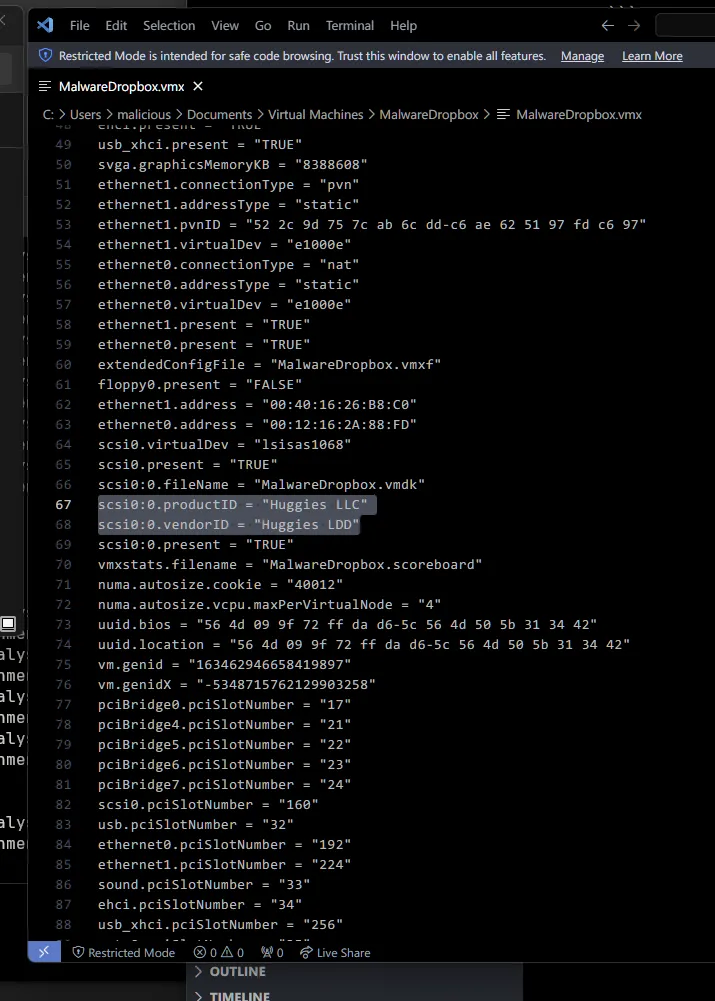
Save the changes and restart the machine.
Setup WireGuard
Install WireGuard on the Windows 10 VM, download the WireGuard and proceed with the installation.
Next, we need to attribute an IP address to the second interface of the VM, to do that, open the command prompt as administrator and run the following command :
netsh interface show interface // to show all the interfaces
netsh interface ip set address "Ethernet1" static 10.0.0.2 255.255.0.0
ipconfig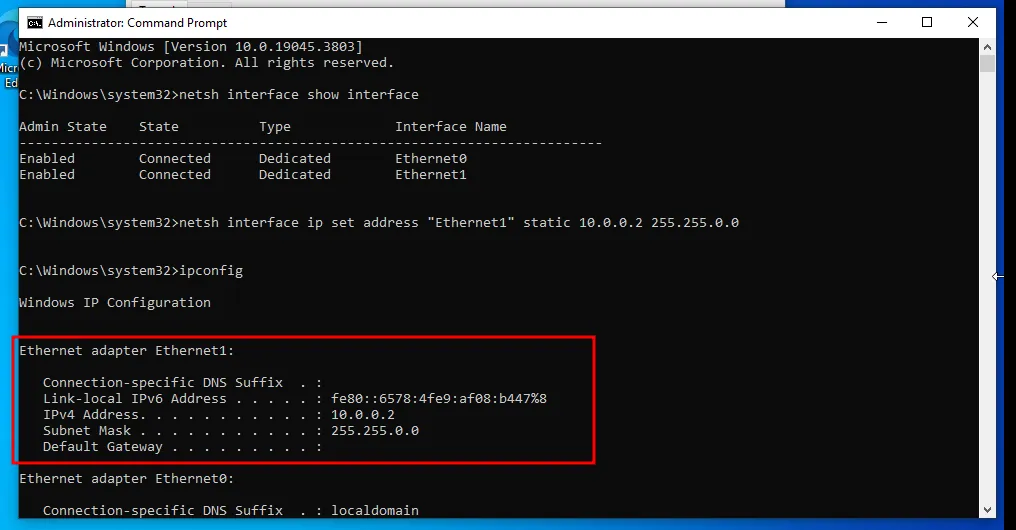
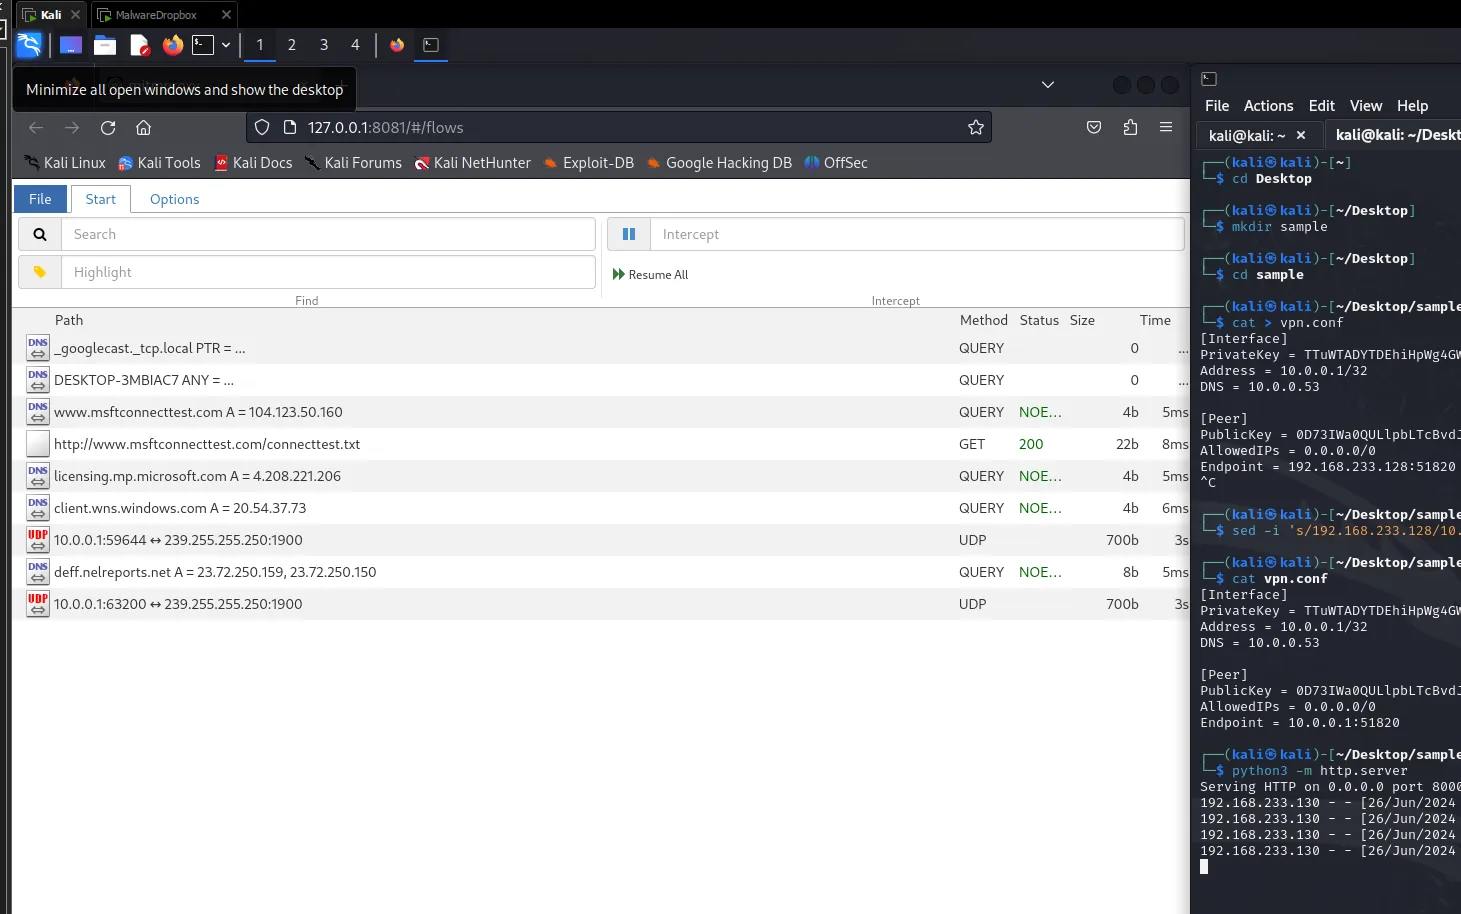
Next, go back to your Kali Linux VM and create a temp folder to store the VPN configuration file. You can use the same commands to create the configuration file.
mkdir ~/Desktop/sample
cd ~/Desktop/sample
cat > vpn.conf << EOF
your config
EOF
sed -i 's/192.168.233.128/10.0.0.1/g' vpn.conf
Be careful! Replace 192.168.233.128 with the IP address of the LAN IP address that we set up earlier (10.0.0.1 in my case).
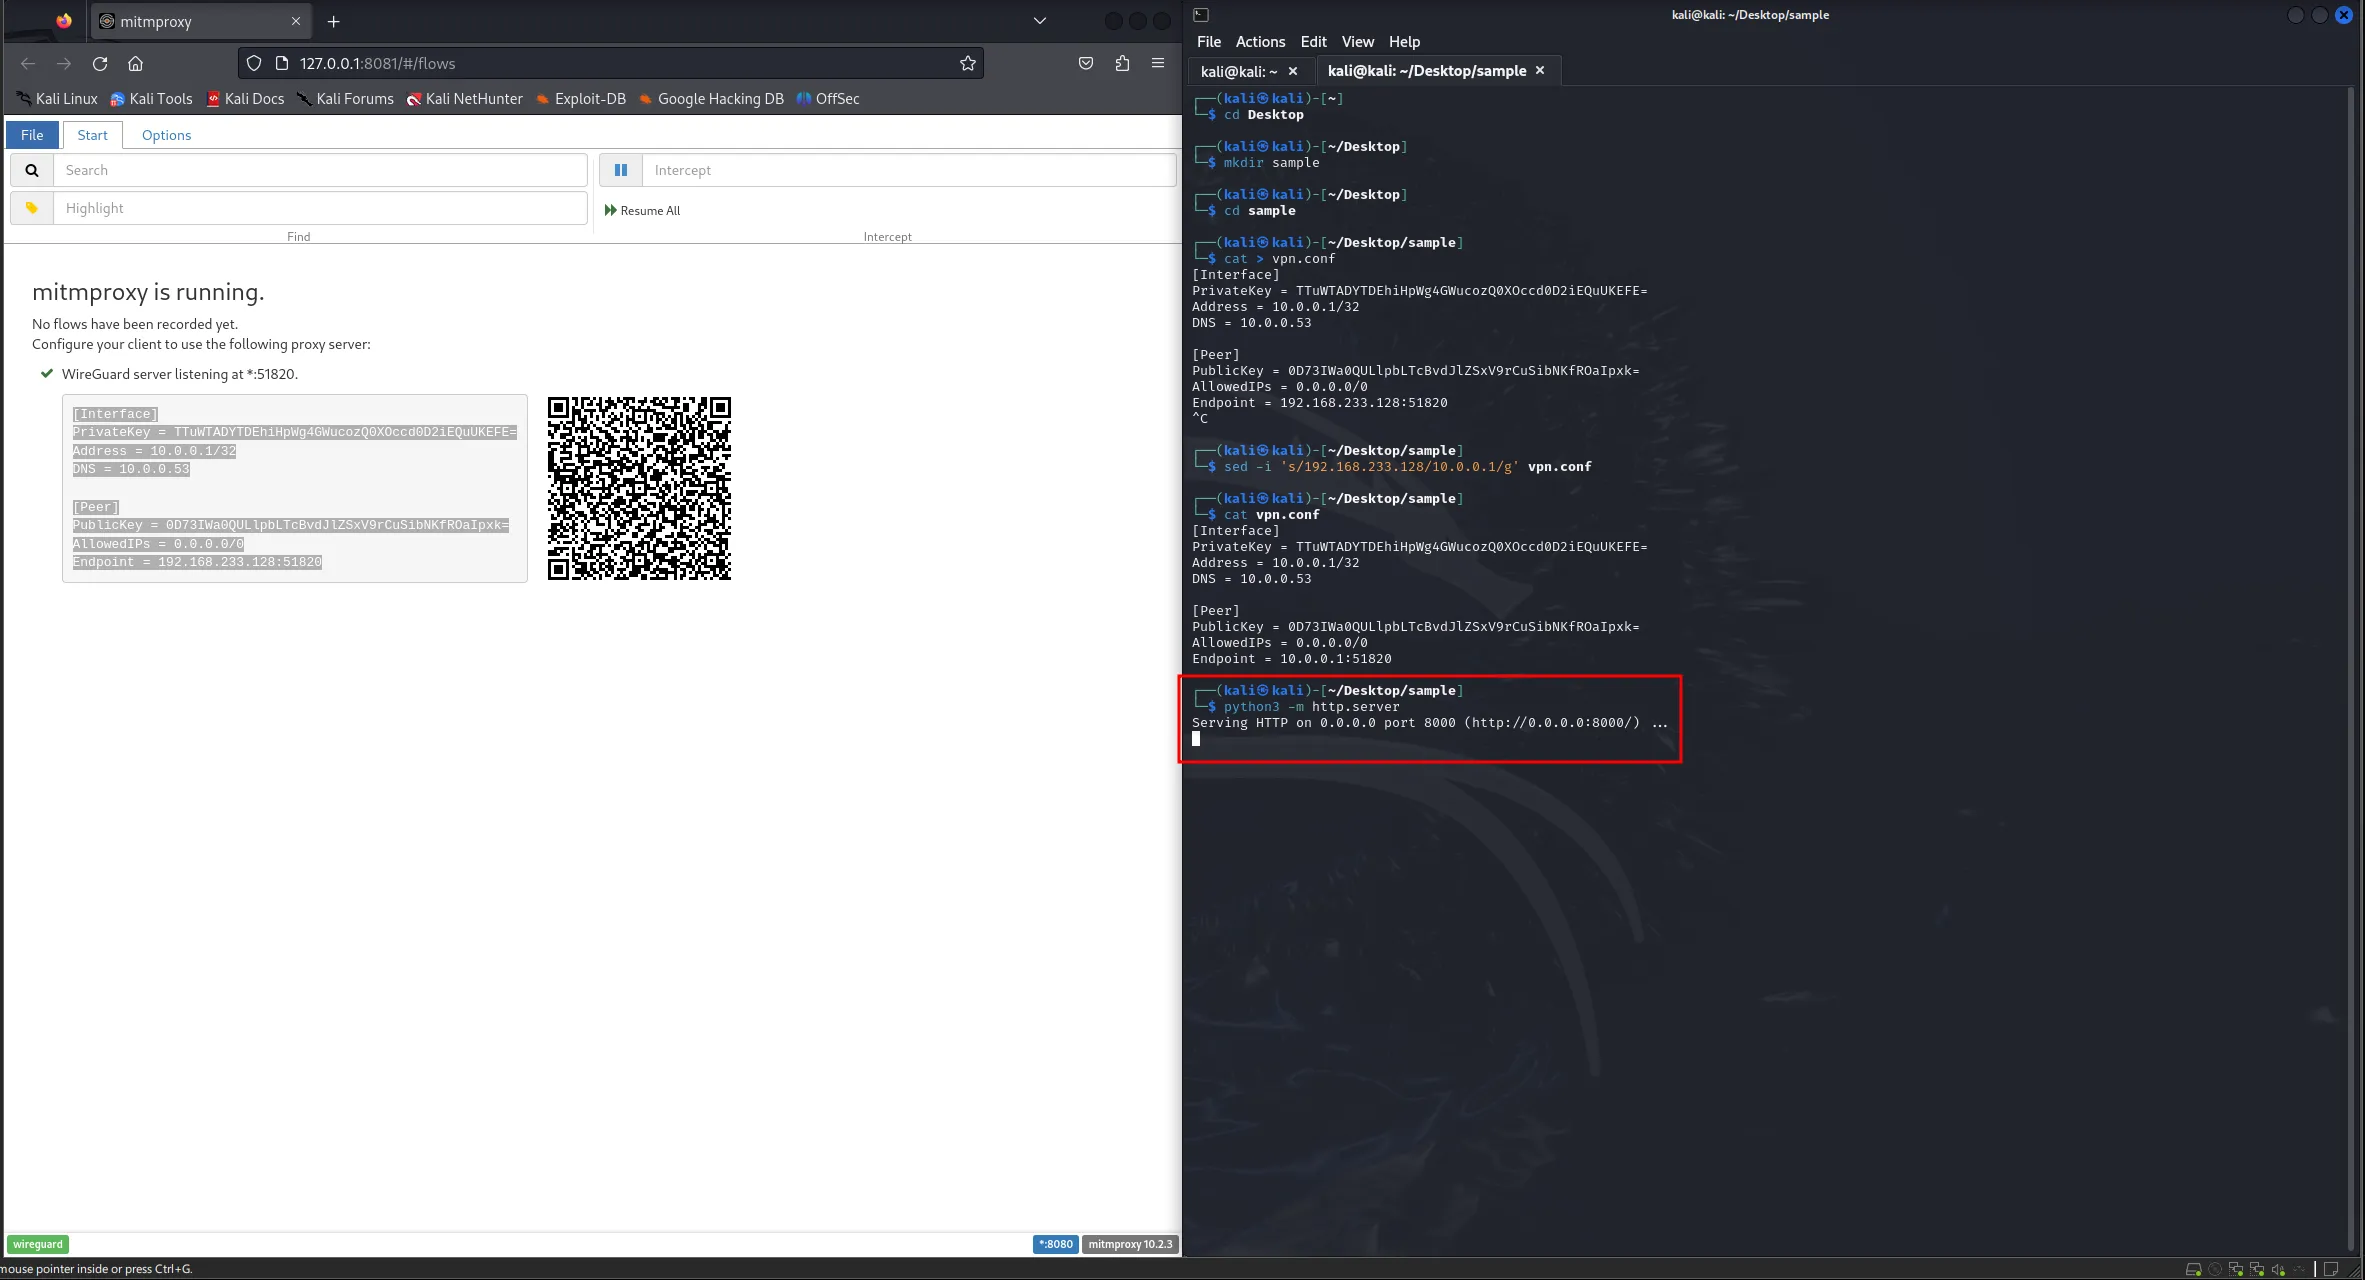
To download the configuration file, I use the built-in Python HTTP server and download it on my Windows machine (since we don’t have VMware Tools installed).
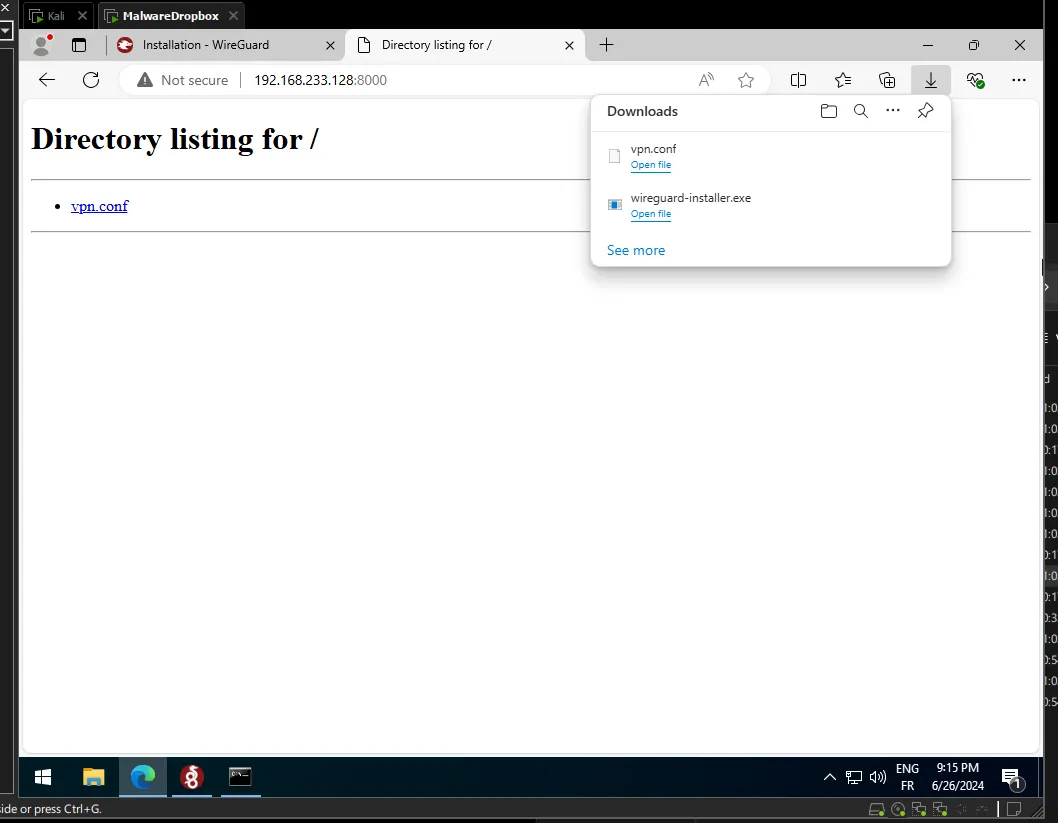
Import it and click activate.
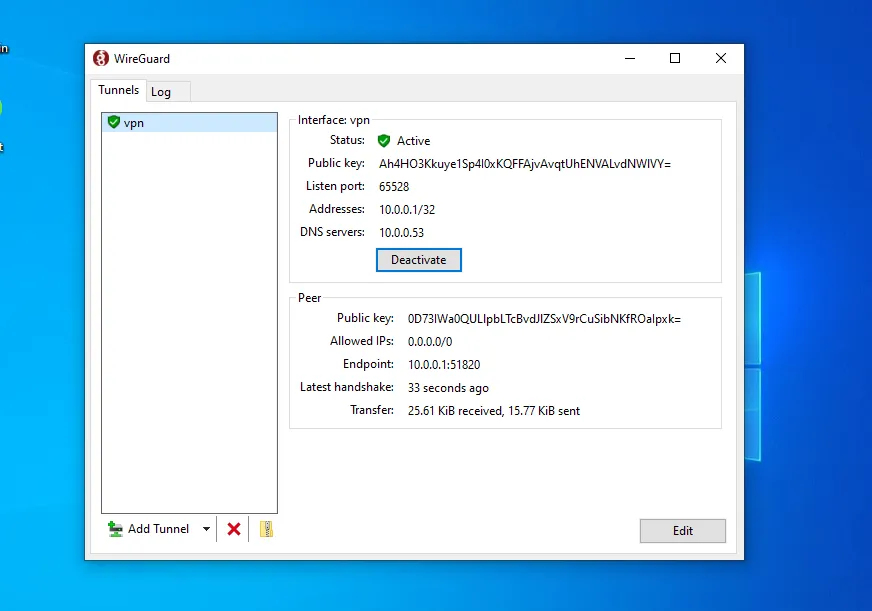
Go back on your kali machine and you can see all the incoming traffic.
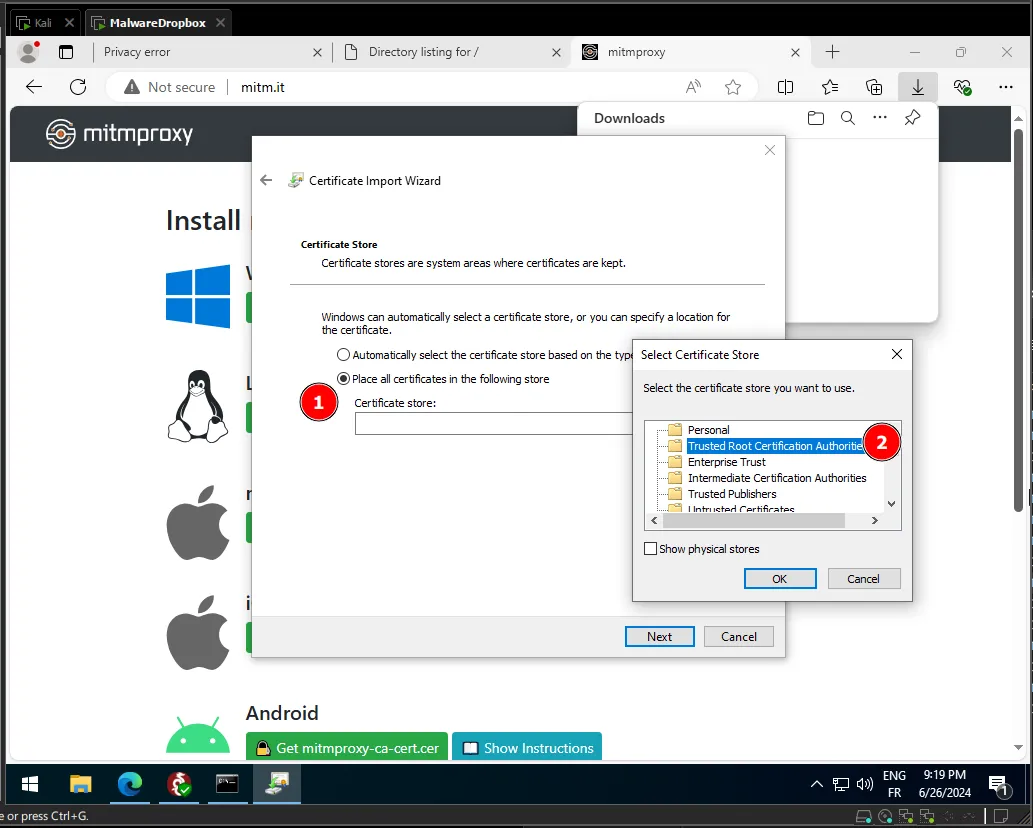
To finish the setup, we need to install the root certificate on the windows machine to trust the traffic, to do that go to http://mitm.it and download the certificate.
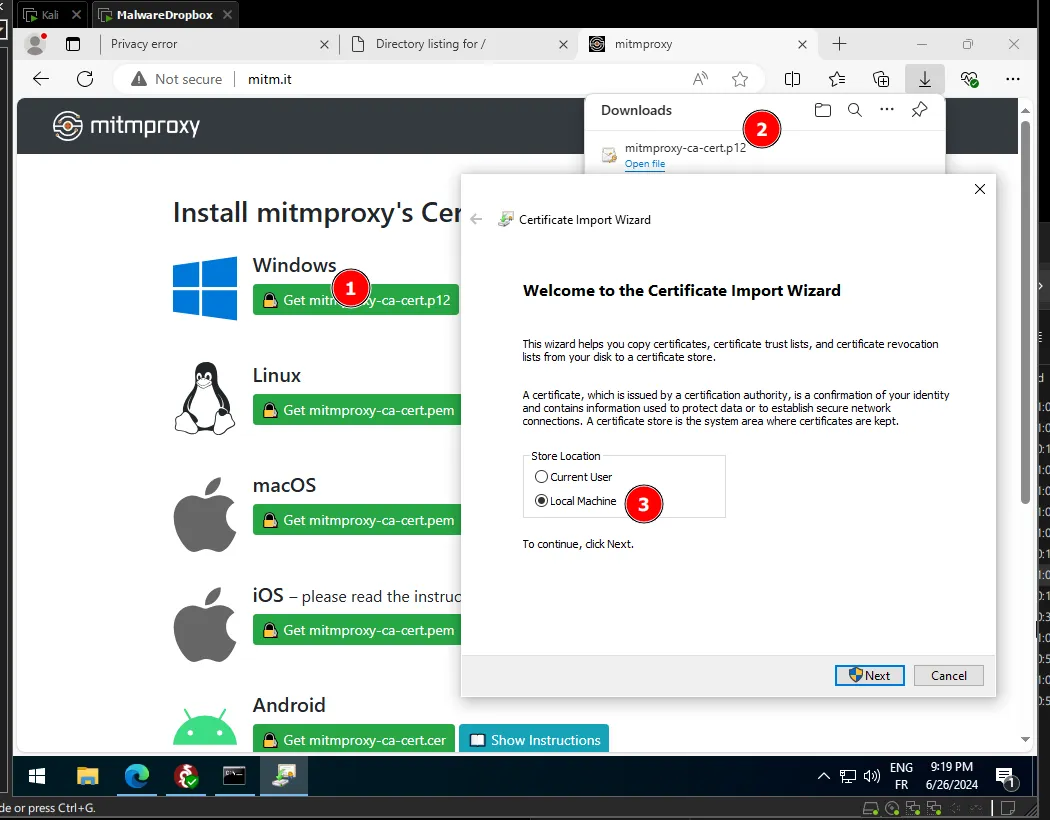
Proceed with the installation then place the certificate on the Trusted Root certification Authorities.
Sanity check
To wrap up the article, we can test our machine by downloading Pafish and running it on the windows machine.
Pafish is a testing tool that uses different techniques to detect virtual machines and malware analysis environments in the same way that malware families do.
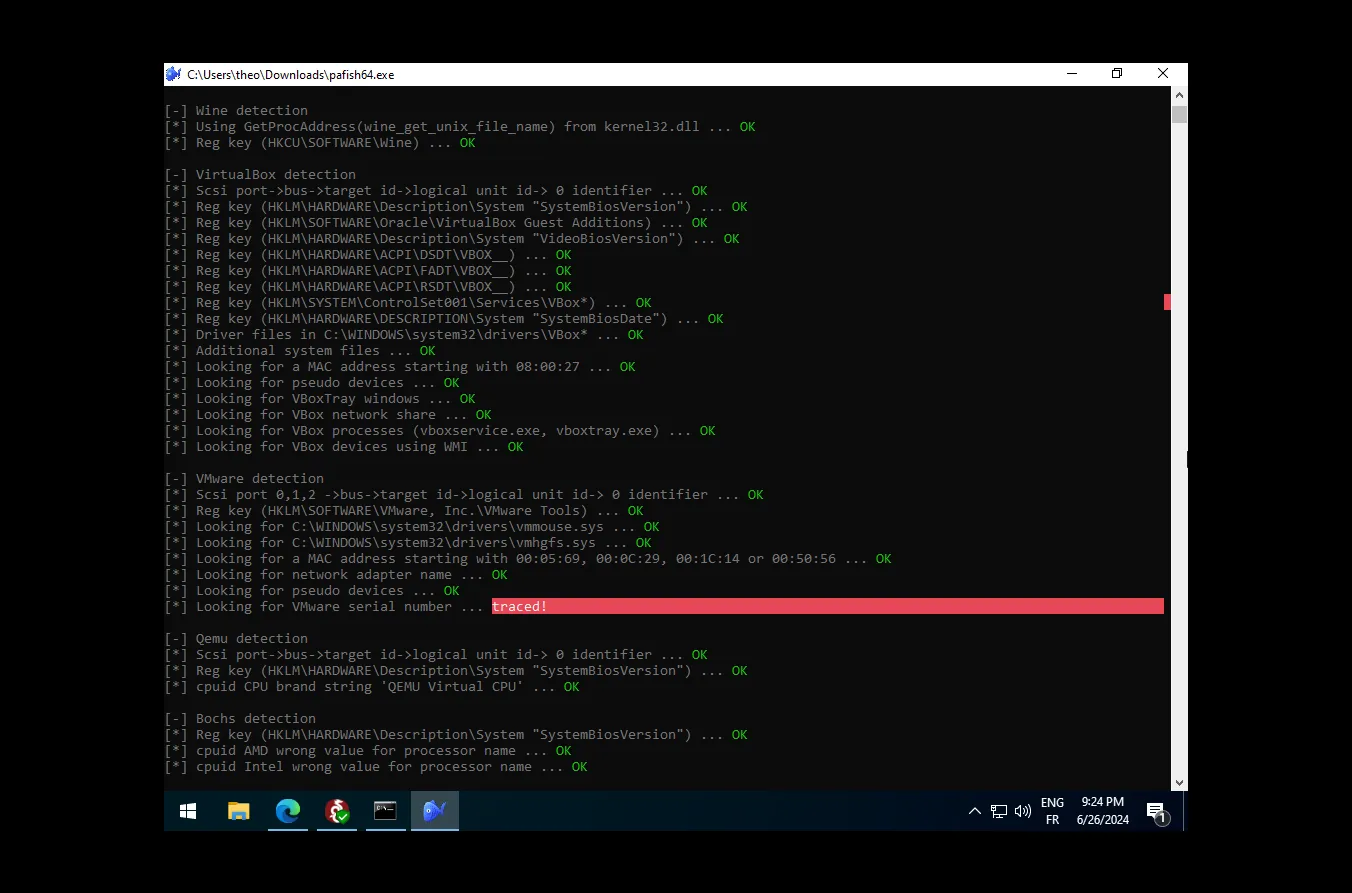
As you can see, not all the tests are passed, but it’s still a good start to create an “undetectable” virtual machine for malware analysis.
Now you can, with serenity, do your malware analysis with your new virtual machine. Enjoy!
Ducktail infostealer malware analysis article coming soon, surely…